
To grow garlic at home, select climate-appropriate varieties, prepare well-drained, fertile soil amended with compost and balanced nutrients at pH 6.0–6.5, plant cloves 2–3 inches deep and 4–6 inches apart in fall (or pre-chilled for spring), mulch for protection, maintain consistent moisture and timely fertilization, remove scapes in early summer, and harvest when lower leaves brown after 8–9 months; cure and store bulbs properly for long-term use.
Introduction
Homegrown garlic delivers superior flavor, freshness, and variety selection compared to store-bought bulbs. Whether you have a spacious garden, raised beds, or a few large containers, garlic adapts to diverse growing systems. This guide covers everything—from choosing the right varieties and seed cloves to soil preparation, planting strategies, seasonal care, pest management, harvest, curing, and storage—ensuring a bountiful garlic harvest year after year.
Choosing Garlic Varieties for Your Garden
Garlic is broadly classified into two types—hardneck and softneck—each with distinct characteristics.
Hardneck garlic produces a stiff central stalk (scape) and thrives in cold climates (zones 1–6). Varieties such as Music, Chesnok Red, and Purple Glazer offer bold flavors and easy peeling but store for 4–6 months.
Softneck garlic lacks a central stalk, making it ideal for braiding and long storage (8–10 months). Varieties like California Early, Inchelium Red, and Italian Late perform well in milder climates (zones 5–9) and produce multiple layers of smaller cloves.
For home gardens, consider hardneck for complex flavors and spring scapes, and softneck for extended storage and braiding.
Seed Garlic: Selection and Storage
Purchase certified disease-free seed garlic from reputable suppliers in late summer. Avoid grocery-store garlic, which may be treated to prevent sprouting and harbor viruses. Store seed garlic in a cool (35–50 °F), dry, well-ventilated area to maintain viability until planting.
When ready to plant, inspect bulbs and select the largest, firmest cloves for best yields. Reserve small or damaged cloves for cooking and discard any showing mold or rot.
Site Selection and Soil Preparation
Garlic prefers full sun—at least 6–8 hours of direct sunlight daily—and well-drained soil rich in organic matter. Choose a location away from previous allium crops (onions, leeks) to prevent disease buildup.
Soil Testing and Amendment
Conduct a soil test 4–6 weeks before planting to determine pH and nutrient levels. Aim for pH 6.0–6.5. Amend acidic soil with ground limestone or alkaline soil with elemental sulfur based on test recommendations.
Incorporate 2–4 inches of well-aged compost or manure into the top 8–12 inches of soil. Mix in balanced granular fertilizer (e.g., 10-10-10 N-P-K) at a rate of 1–2 pounds per 100 square feet to supply baseline nutrients.
Drainage Improvement
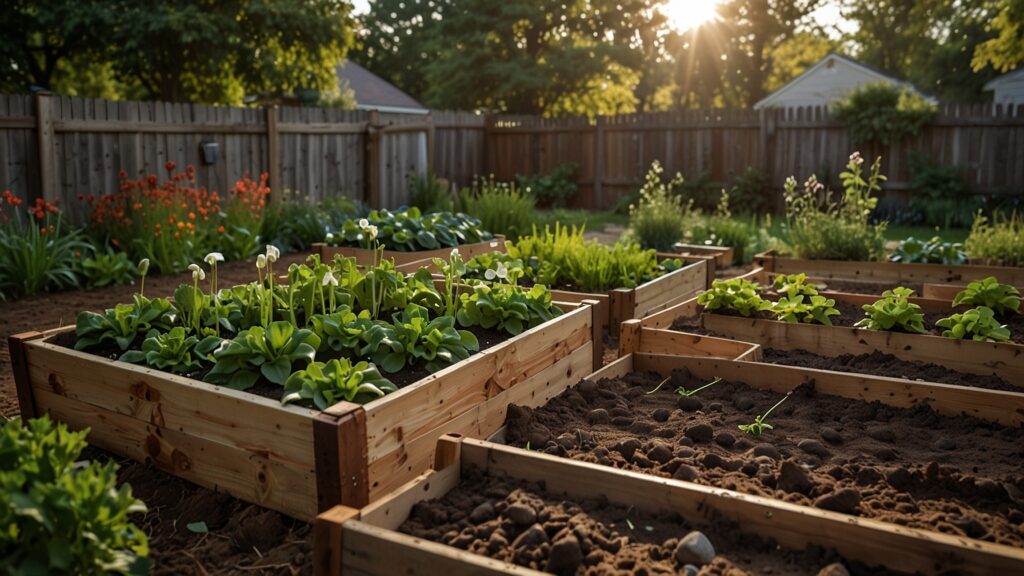
Garlic bulbs rot in waterlogged soil. If your soil is heavy or clay-based, build raised beds or grow in large containers. Amend soil with coarse sand or perlite (10–20%) to improve drainage.
Planting Garlic: Timing and Technique
Fall Planting
For most regions, fall planting yields the best results. Plant cloves 4–6 weeks before the first hard frost, when soil temperatures are around 50 °F. This timing allows root establishment before winter dormancy and ensures vernalization (cold exposure) for bulb formation.
Spring Planting (Optional)
In mild climates or for gardeners who miss fall planting, spring planting is possible. Pre-chill cloves at 35–40 °F for 4–6 weeks to simulate winter cold. Plant cloves as soon as soil is workable, 4–6 weeks before the last frost, when soil temperature remains 40–50 °F.
Planting Technique
Separate bulbs into individual cloves just before planting. Handle cloves gently to avoid damaging the basal plate. Dig holes or trenches 2–3 inches deep, spacing cloves 4–6 inches apart in all directions. Space rows 12–18 inches apart for maintenance access. Position each clove pointy end up and basal plate down, then firm soil gently over the clove.
Mulch immediately with 2–4 inches of straw, shredded leaves, or grass clippings to insulate soil, suppress weeds, and prevent frost heaving.
Seasonal Care and Maintenance
Winter Care
In cold zones, maintain mulch depth throughout winter to prevent soil freezing solid. For container garlic, group pots together or move under eaves and wrap containers with insulating material. Ensure mulched areas remain visible to avoid accidental disturbance.
Spring Emergence
Remove any impermeable covers as shoots emerge, but leave mulch to conserve moisture. Monitor soil moisture; garlic prefers evenly moist but not waterlogged conditions. Begin irrigation once shoots appear and continue until 2–3 weeks before harvest.
Fertilization Schedule
Apply a high-nitrogen feed (e.g., blood meal, fish emulsion) when shoots reach 2–3 inches. Follow with a balanced fertilizer 4–6 weeks later. Avoid high nitrogen late in the season to prevent delayed bulb maturation and poor storage quality.
Scape Management
Hardneck varieties produce scapes in late spring. Harvest scapes at the tight-curl stage by snapping them off at the base. This redirects energy into bulb growth and provides delicious allium greens for stir-fries or pesto.
Weed Control
Hand-weed gently to avoid bulb disturbance. Maintain mulch to suppress weed germination. Avoid herbicides near garlic beds to prevent damage.
Pest and Disease Monitoring
Inspect plants weekly for pests: thrips (silver streaks), aphids (clusters), and spider mites (webbing). Treat minor infestations early with insecticidal soap or neem oil. Remove diseased foliage promptly. Practice crop rotation—avoid planting alliums in the same spot for at least four years to reduce soil-borne disease pressure.
Harvesting Garlic
Garlic requires 8–9 months from planting to harvest. Indicators of readiness include:
- Bottom 4–6 leaves browning while upper leaves remain green
- Scapes have been removed, and foliage begins to yellow
- Bulb wrapper leaves bulge slightly between cloves
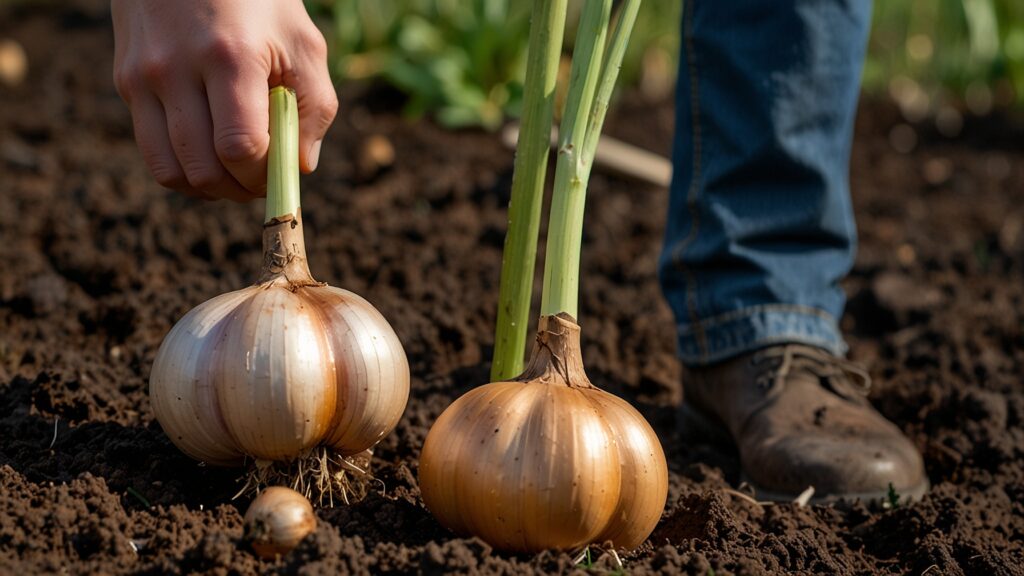
Stop irrigation 2–3 weeks before harvest to harden bulbs. Harvest on a dry day for best curing conditions. Use a garden fork to loosen soil, then lift bulbs gently, brushing off loose soil without removing wrapper leaves. Avoid bruising bulbs to maximize storage life.
Curing and Storage
Curing Process
Proper curing develops flavor and extends shelf life. Choose a shaded, well-ventilated area with temperatures of 70–80 °F and moderate humidity (50–60%). Hang garlic plants in bundles by stalks or spread bulbs in single layers on mesh racks. Turn bulbs weekly for even drying. Cure for 2–4 weeks until wrappers are papery and necks are completely dry.
Storage Preparation
After curing, trim roots to ¼ inch and cut stalks to 1 inch above bulbs. Store softneck in braids or mesh bags at 32–40 °F and 60–70% humidity. Hardneck varieties store 4–6 months; softneck store 8–10 months. Use any sprouting or soft bulbs first.
Preservation Alternatives
- Freeze peeled cloves or garlic-oil cubes for up to one year
- Dehydrate cloves into flakes or powder, then store in airtight containers
- Infuse oils or vinegars with raw garlic (acidify properly to prevent botulism)
- Ferment whole cloves in brine for unique flavors and extended preservation
Troubleshooting Common Issues
- Small Bulbs: Insufficient cold exposure, tight spacing, or nutrient deficiencies. Ensure proper fall planting and maintain 4–6 inch spacing.
- Poor Emergence: Clove damage, rot, or planting too deep. Check storage conditions and planting depth.
- Rotting Bulbs: Waterlogged soil; improve drainage and reduce irrigation.
- Delayed Scape Emergence: Late fall planting or heavy mulch; adjust planting timing and mulch thickness.
Keeping detailed records of planting dates, varieties, and yields helps refine techniques each season.
Companion Planting and Garden Integration
Garlic’s natural pest-repellent properties make it an excellent companion for roses, tomatoes, peppers, and brassicas. Interplant garlic around susceptible crops to deter aphids, spider mites, and other pests. After garlic harvest, rotate beds to host legumes or leafy greens to maintain soil fertility.
Conclusion
Growing garlic at home is a rewarding, year-long project that yields fresh, flavorful bulbs and edible greens. With careful variety selection, soil preparation, planting timing, seasonal care, and proper harvest and storage, home gardeners can enjoy a continuous supply of high-quality garlic while customizing varieties to their taste preferences. Whether in a traditional garden bed, raised beds, or containers, garlic thrives under attentive care, rewarding gardeners with abundant harvests and culinary delights.