
To grow garlic in water, start with sprouted cloves in jars for quick greens or use a deep water culture (DWC) hydroponic system for bulbs. In jars, submerge roots, change water every 2–3 days, and harvest greens in 7–10 days. In DWC, suspend cloves in net pots over an aerated nutrient reservoir (pH 6.0–6.5, EC 1.2–1.6 mS/cm), provide LED lighting 12 hrs on/12 hrs off, and maintain temperatures of 65–75 °F. Jar culture yields continuous greens for 4–6 weeks; DWC can produce small bulbs in 4–6 months.
Benefits of Water-Based Garlic Cultivation
Growing garlic in water eliminates soil-borne pests and diseases, conserves space, and offers rapid harvesting of tender greens. Jar methods suit hobbyists and culinary enthusiasts, while hydroponics appeals to urban growers and experimental gardeners seeking year-round production and precise nutrient control. Both techniques require minimal equipment and offer engaging, hands-on projects ideal for schools, apartments, or kitchen counters.
Jar-Based Simple Water Culture
Selecting and Preparing Cloves
Choose firm garlic cloves showing slight sprout tips or pre-sprout cloves by laying them on damp paper towels in bright, indirect light at 65–70 °F for 7–10 days. Pre-sprouting improves uniformity and success rates but is optional.
Jar Setup
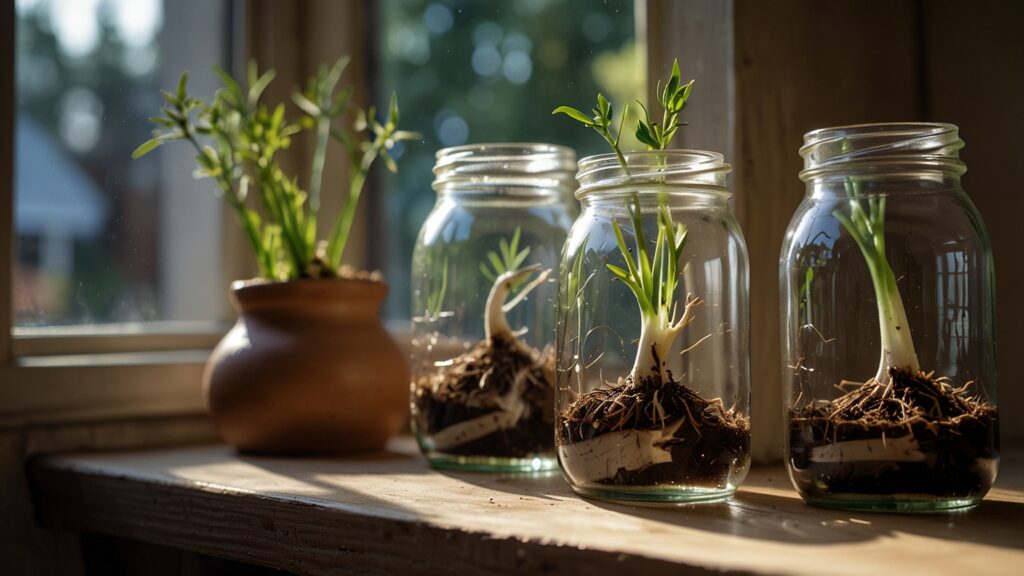
Use clear glass or food-grade plastic jars. Fill jars with filtered or distilled water to just cover the basal end of each clove, leaving the pointed tip above water to prevent rot. Place one clove per jar to avoid overcrowding roots.
Water Management
Change the water every 2–3 days to replenish oxygen and nutrients and prevent bacterial or fungal growth. Rinse jars and roots gently to remove debris. Use room-temperature water to avoid shocking roots.
Light Requirements
Position jars where they receive 6–8 hours of bright, indirect sunlight or under cool-white fluorescent bulbs. Rotate jars daily for even growth and prevent shoots from bending toward a single light source.
Harvesting Greens
Within 7–10 days, expect 4–6 inch green shoots. Snip outer leaves at the base with scissors, allowing inner shoots to continue growing. Harvest every 3–4 days for up to 4–6 weeks until shoots thin or roots weaken. Use greens as garnishes, in salads, or incorporated into soups and stir-fries.
Transitioning to Bulb Production
Jar methods focus on greens, but if bulbs are desired, transfer vigorously growing cloves to a hydroponic DWC system once roots reach 1–2 inches. This shift provides stable nutrients and oxygen for bulb development.
Deep Water Culture (DWC) Hydroponic System
Equipment and Materials
- Reservoir: Food-grade container sized for net pots.
- Net Pots: 2–4 inch diameter pots with mesh sides.
- Growing Medium: Clay pebbles or rockwool cubes.
- Air Pump & Airstones: Maintain dissolved oxygen >6 ppm in the nutrient solution.
- Hydroponic Nutrients: Commercial formulations for leafy greens/herbs.
- pH Kit & EC Meter: Monitor solution pH and electrical conductivity.
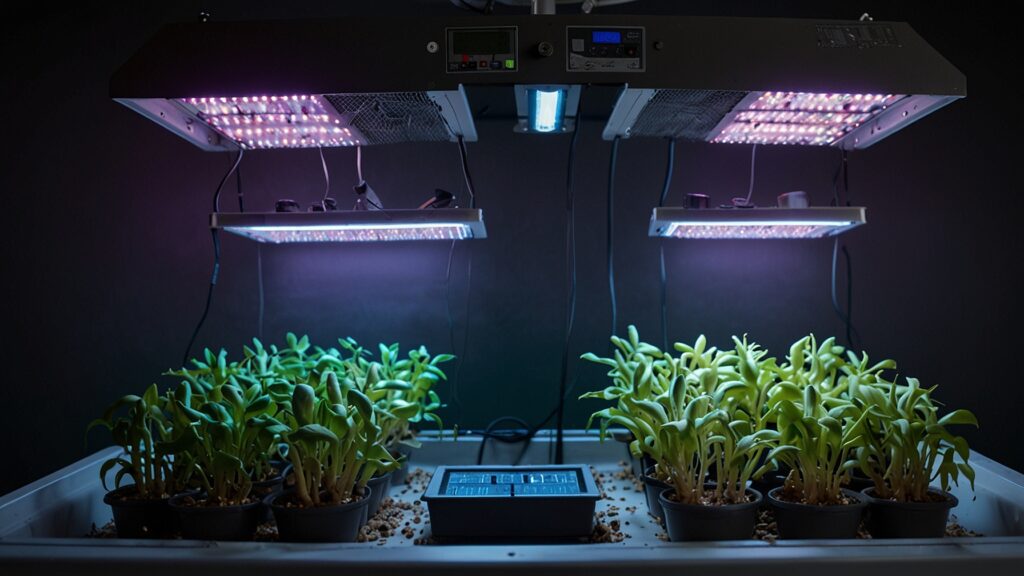
- LED Grow Lights: Full-spectrum LEDs with adjustable height.
Reservoir Preparation
Mix nutrient solution to manufacturer’s recommended concentration, then adjust pH to 6.0–6.5 using pH Up/Down. Fill reservoir to just below net pot bottom to prevent crown submersion.
Clove Placement
Gently transfer pre-sprouted cloves into net pots filled with clay pebbles or moistened rockwool. Ensure roots can access solution while crown remains above waterline.
Environmental Controls
- Lighting: Set LED lights for 12 hrs on/12 hrs off. Maintain 12–18 inches distance from canopy to avoid light burn.
- Temperature: Keep nutrient solution at 65–75 °F; air temp at 60–75 °F.
- Humidity & Airflow: Aim for 50–60% humidity; use a small fan for gentle air circulation to prevent mold and strengthen shoots.
Nutrient and pH Management
Check pH daily initially, then weekly once stable. Monitor EC every 2–3 days and adjust to maintain 1.2–1.6 mS/cm. Top off reservoir with pH-adjusted water as levels drop. Completely replace and clean reservoir every 2–3 weeks to prevent nutrient imbalances and algae.
Growth Stages
- Weeks 1–4: Rapid foliage growth; maintain nutrient solution and lighting schedule.
- Weeks 5–12: Stem thickening; roots densify; adjust nutrients if foliage shows deficiency signs (yellowing or purple tints).
- Months 4–6: Bulb initiation; reduce nitrogen slightly and maintain potassium for bulb formation; consider extending dark period to 14 hrs if bulbs stall.
Harvesting Hydroponic Bulbs and Greens
Greens Harvest
Continue snipping outer leaves during early stages for fresh greens. Avoid over-harvesting to ensure sufficient foliage remains for bulb development.
Bulb Harvest
When foliage yellows and flops, usually 4–6 months after planting, stop adding nutrients and switch to plain water for 1 week. Gently lift net pots, remove cloves, and rinse bulb surfaces.
Cleaning and Curing
Brush off medium and rinse roots. Cure bulbs in a shaded, well-ventilated area at 70–80 °F with 50–60% humidity for 1–2 weeks until outer skins are papery. Trim roots and stalks for storage.
Troubleshooting Common Issues
- Yellowing Leaves: Check EC and pH; adjust nutrient strength.
- Sluggish Growth: Increase light intensity or duration; verify air pump operation.
- Root Rot: Clean airstone; ensure roots receive adequate oxygen.
- Algae Bloom: Cover reservoir to block light; scrub surfaces.
- Pest Intrusion: Inspect for gnats or molds; use biological controls or dilute hydrogen peroxide rinse (1 mL per 1 L water).
Preservation and Culinary Use
Jar-grown greens add fresh garlic flavor to dishes. Chop greens with a pinch of salt and freeze in ice cube trays with olive oil for cooking convenience. Dehydrate extras into flakes or powder. Hydroponic bulbs, once cured, can be stored at room temperature in a mesh bag for up to six months. Create garlic-infused oils or vinegars—ensure proper acidification to prevent botulism.
Benefits and Considerations
Water culture matches urban lifestyles by using minimal space and avoiding messy soil. Jar methods engage beginners; hydroponics challenges advanced growers. Both approaches require commitment to monitoring water quality and light schedules but reward with fresh garlic greens and experimental small bulbs year-round.
Growing garlic in water combines speed, control, and novelty—ideal for home cooks, educators, and hydroponic enthusiasts seeking to expand their indoor gardening horizons.