
Growing garlic at home is one of the most rewarding gardening experiences, producing aromatic, flavorful bulbs that far exceed store-bought varieties in taste, freshness, and nutritional value. This comprehensive guide covers every aspect of garlic cultivation, from variety selection to harvest and storage techniques.
Garlic (Allium sativum) has been cultivated for over 6,000 years and remains one of the most valuable crops for both culinary and medicinal purposes. While garlic requires patience—taking 8-9 months from planting to harvest—the process is surprisingly straightforward and accessible to gardeners of all skill levels. The key to success lies in understanding garlic’s unique growing requirements, particularly its need for cold dormancy and long growing season.
Modern home gardeners have access to hundreds of garlic varieties unavailable in grocery stores, each offering distinct flavors, storage capabilities, and growing characteristics. From the chef’s favorite Rocambole types to the long-storing softneck varieties, choosing the right garlic for your climate and preferences is the first step toward garlic growing success.
Understanding Garlic Types and Varieties
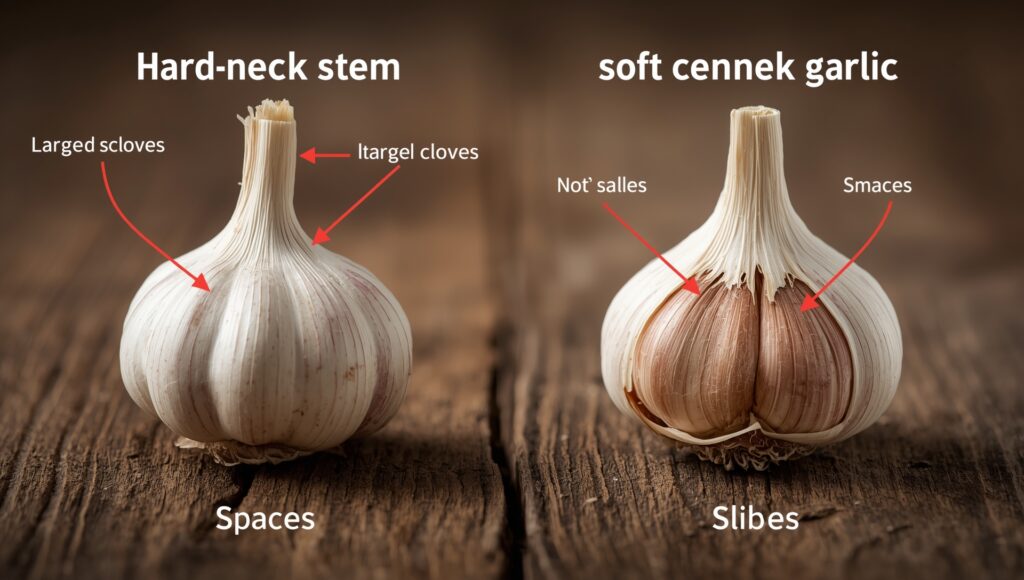
Hardneck vs. Softneck: The Primary Classification
Garlic falls into two main categories based on their flowering behavior and climate adaptations. Understanding these differences is crucial for selecting varieties that will thrive in your specific growing conditions.
Hardneck Garlic produces a rigid, woody central stalk called a scape that emerges in early summer. These varieties are specifically adapted to cold climates and require 40-60 days of temperatures below 40°F (4°C) to trigger proper bulb formation—a process called vernalization. Without adequate cold exposure, hardneck varieties may fail to form cloves, instead producing single, onion-like bulbs.
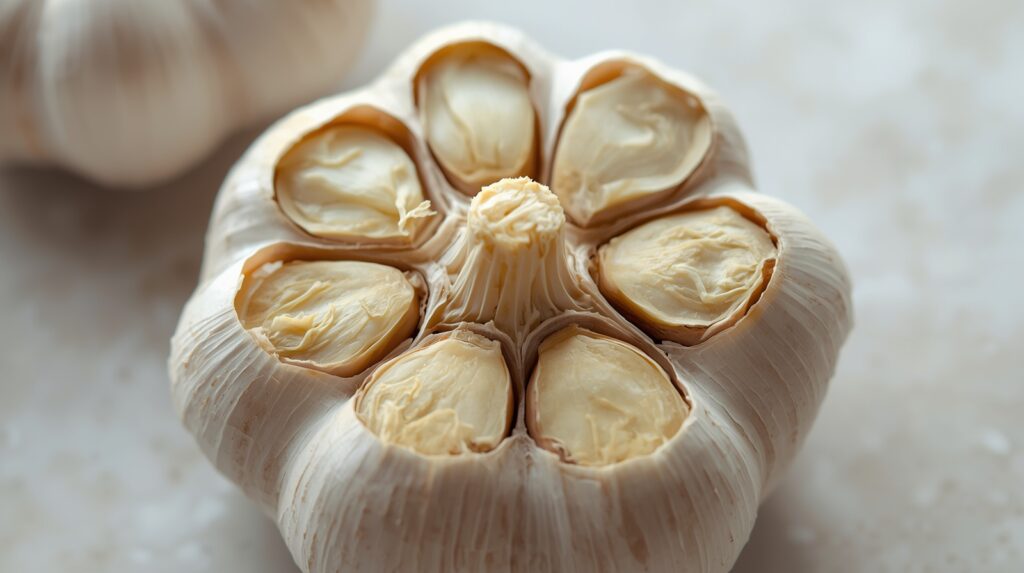
Hardneck garlic typically produces 4-12 large, uniform cloves arranged around the central stalk. The cloves are generally easier to peel due to looser skin attachment, making them preferred by many chefs. However, hardneck varieties have shorter storage lives, typically lasting 4-6 months when properly cured.
According to USDA hardiness zones, hardneck garlic performs best in zones 1-5, though it can be successfully grown in zones 6-7 with proper variety selection. Popular hardneck varieties include Music, German Extra Hardy, Chesnok Red, and Russian Red.
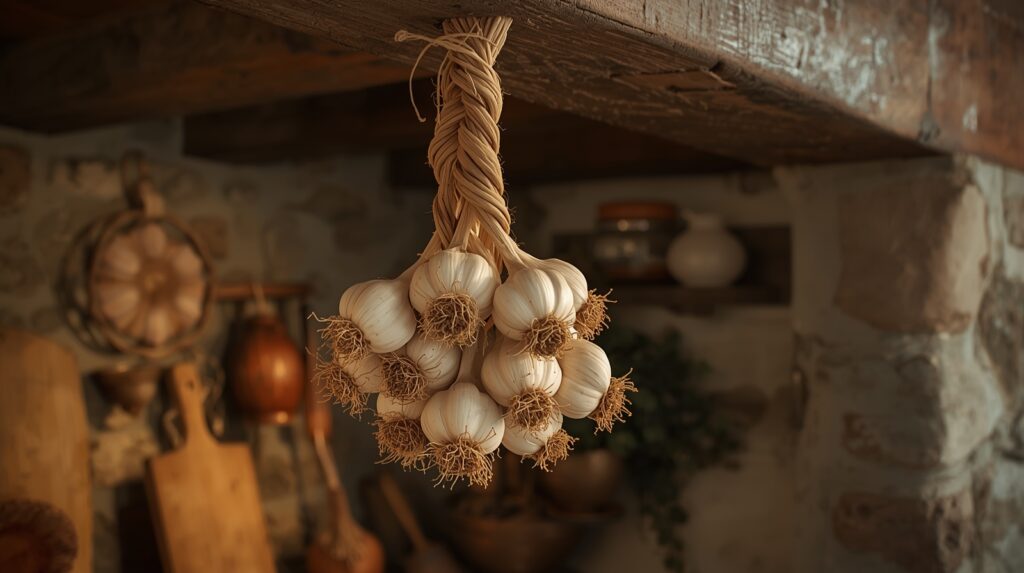
Softneck Garlic lacks the hard central stalk, making it ideal for braiding—a traditional storage method. These varieties thrive in warmer climates (zones 8-12) and don’t require extended cold periods for proper development. Softneck garlic produces multiple layers of smaller cloves, often 12-20 per bulb, with excellent storage potential of 6-10 months.
The longer storage life and mild flavor profile make softneck garlic the type commonly found in grocery stores. While softneck varieties can be grown in colder climates, they may not develop full-sized bulbs without adequate heat units.
Garlic Families and Flavor Profiles
Within the hardneck and softneck classifications, garlic is further divided into distinct families, each with unique characteristics.
Rocambole represents the pinnacle of culinary garlic, favored by chefs for its complex, rich flavor. These varieties produce 8-12 easily peeled cloves with loose, papery skins. Rocambole garlic offers intense flavor that varies among varieties but generally provides the most robust taste profile. However, they have the shortest storage life (4-6 months) and require careful moisture management during growing.
Purple Stripe garlic ranks among the oldest cultivated types and is considered exceptional for baking applications. Recognizable by distinctive purple stripes running down the bulb wrapper, these varieties produce 8-12 medium-sized cloves that intensify in flavor as they age. Purple Stripe varieties store 4-8 months and offer unique flavor development during storage.
Porcelain varieties produce the largest bulbs with 4-6 very large cloves per bulb. These varieties offer mild to moderate flavor intensity with excellent storage potential. Porcelain types are often the most cold-hardy hardneck varieties.
Climate Requirements and Zone Selection
Temperature and Seasonal Needs
Garlic requires specific temperature conditions throughout its growing cycle to develop properly. The crop thrives in moderate climates with cool, moist winters and warm, dry summers. During vegetative growth, garlic prefers temperatures between 54-64°F (12-18°C), while bulb formation occurs optimally at temperatures between 68-86°F (20-30°C).
Winter temperatures below -13°F (-25°C) can cause cold stress symptoms including wilting, drooping, and tissue necrosis. Conversely, summer temperatures exceeding 109°F (43°C) induce heat stress, slowing growth and increasing susceptibility to sunburn. High humidity levels above 45-50% during the growing season can promote mold and fungal diseases.
Vernalization Requirements
The vernalization process is critical for proper garlic development. Hardneck varieties require extended exposure to temperatures between 32-50°F (0-10°C) for 40-60 days to trigger the genetic switches that promote clove formation. This cold requirement ensures that garlic doesn’t attempt to form bulbs during unsuitable growing conditions.
Softneck varieties have much lower vernalization requirements, making them suitable for warmer climates where winters don’t provide adequate chilling hours. This adaptability allows softneck garlic to be grown successfully in Mediterranean, subtropical, and even tropical environments.
Light Requirements
Despite growing primarily underground, garlic requires full sun exposure (6-8 hours daily) for optimal photosynthesis and bulb development. Adequate sunlight ensures vigorous foliage growth, which directly correlates to bulb size—each leaf above ground represents one layer of wrapper around the developing bulb.
Insufficient light results in weak growth, smaller bulbs, and increased susceptibility to diseases. In areas with intense summer heat, afternoon shade during the hottest part of the day can be beneficial, but morning and early afternoon sun remain essential.
Soil Requirements and Preparation
Soil Composition and Drainage
Garlic thrives in loose, well-drained soil with excellent organic matter content. The ideal soil composition includes loam, sandy loam, or any combination that provides good drainage while retaining adequate moisture. Heavy clay soils that retain water lead to bulb rot and disease problems, while extremely sandy soils may not provide sufficient moisture retention.
Poor drainage is the leading cause of garlic failure. Garlic bulbs sitting in waterlogged soil are highly susceptible to fungal diseases, particularly white rot and fusarium. In areas with heavy clay or poor natural drainage, raised beds or container growing becomes essential.
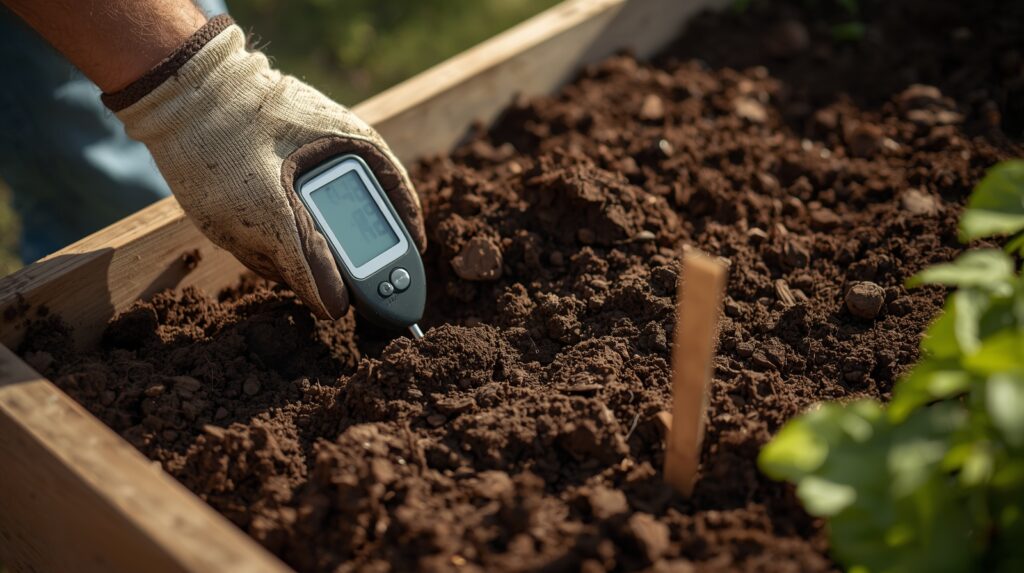
Soil pH and Nutrient Management
Garlic performs best in slightly acidic to neutral soil with pH between 6.0-6.5. This pH range ensures optimal nutrient availability, particularly for essential elements like nitrogen, phosphorus, and potassium. Soil pH testing should be conducted annually, with adjustments made using ground limestone for acidic soils or sulfur for alkaline conditions.
Garlic is considered a heavy feeder, requiring substantial nutrient inputs throughout its long growing season. The crop demands 60-300 kg of nitrogen, 50-200 kg of phosphorus, and 80-300 kg of potassium per hectare, depending on soil conditions and expected yields. For home gardeners, this translates to consistent feeding throughout the growing season.
Soil Preparation Timeline
Proper soil preparation should begin 4-6 weeks before planting. This allows time for organic amendments to decompose and integrate into the soil structure. The preparation process includes deep tillage to 8-12 inches, incorporation of 2-4 inches of well-aged compost or manure, and pH adjustment if necessary.
Avoid planting garlic in locations where allium family crops (onions, leeks, chives) have grown within the past 3-4 years. This crop rotation prevents the buildup of soil-borne diseases and pests that specifically target allium crops.
Planting Timing and Techniques
Optimal Planting Windows
Fall planting represents the standard approach for most garlic varieties and growing regions. The ideal timing occurs 4-6 weeks before the ground freezes hard, allowing cloves to establish root systems before entering winter dormancy. This typically translates to October through November planting in most temperate regions.
Soil temperature provides a more precise planting indicator than calendar dates. Plant when soil temperatures consistently read 50°F (10°C) at a 4-inch depth. This temperature ensures that cloves begin root development without triggering premature top growth.
Spring planting remains possible but challenging, requiring early timing while soil temperatures remain cool. Spring-planted garlic needs at least 30 days of temperatures around 40°F (4°C) for proper bulb development. Success rates are generally lower with spring planting, particularly for hardneck varieties.
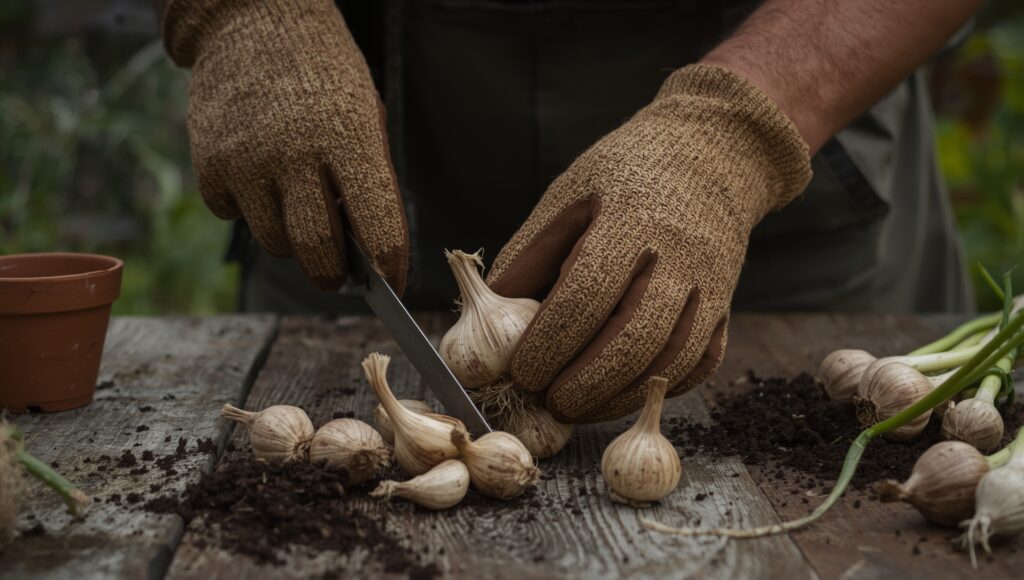
Clove Selection and Preparation
Select the largest, healthiest cloves from your seed garlic bulbs, as clove size directly correlates to mature bulb size. Separate bulbs into individual cloves no more than 24-48 hours before planting to prevent drying. Keep the papery tunic (skin) intact around each clove, as this provides essential protection against soil-borne pathogens.
Avoid using grocery store garlic for planting, as these bulbs are often treated with sprouting inhibitors and may carry diseases. Purchase certified seed garlic from reputable suppliers who test for virus and disease issues.
Pre-sprouting cloves can improve establishment rates and ensure viability. Place cloves in slightly damp conditions at 60-70°F (15-21°C) for 7-10 days until small roots and shoots emerge. Handle pre-sprouted cloves carefully during planting to avoid damaging emerging roots.
Planting Depth and Spacing
Plant cloves with the pointed end up and flat basal plate down. Proper orientation ensures straight emergence and prevents curved or malformed bulbs. Plant 2-3 inches deep in most soils, adjusting depth based on climate—deeper planting (3-4 inches) in colder regions provides better winter protection.
Space cloves 4-6 inches apart in all directions to provide adequate room for bulb development. Closer spacing results in smaller bulbs due to root competition and reduced air circulation. Row spacing should be 12-18 inches apart for maintenance access, or use wide-row planting with uniform 5-6 inch spacing.
Container Growing Excellence

How to grow garlic in pots offers numerous advantages for home gardeners, including precise soil control, better drainage management, and protection from soil-borne pests and diseases. Container cultivation also makes harvest easier and allows gardeners with poor soil or limited space to produce high-quality garlic.
Container Selection and Sizing
Choose containers at least 8-10 inches deep to accommodate garlic’s extensive root system. Container width determines planting capacity—6-inch pots hold 3 cloves, 10-inch pots accommodate 8-10 cloves, and 5-gallon containers provide space for 15-20 cloves.
Ensure containers have adequate drainage holes to prevent waterlogging. Garlic is particularly susceptible to root rot in waterlogged conditions, making drainage the most critical factor in container selection. Consider using containers with built-in water reservoirs or self-watering systems for consistent moisture management.
Soil Mix and Nutrition
Use high-quality potting mix rather than garden soil for container growing. An ideal blend consists of 50% commercial potting mix, 30% aged compost, and 20% perlite or coarse sand for drainage enhancement. This combination provides necessary nutrients while ensuring proper drainage and aeration.
Container-grown garlic requires more frequent fertilization than garden-planted crops due to limited soil volume and faster nutrient depletion. Apply balanced liquid fertilizer every 3-4 weeks during active growth periods, adjusting concentration according to manufacturer recommendations.
Seasonal Container Management
Container garlic needs winter protection in zones 6-8, as pots are more exposed to temperature fluctuations than ground plantings. Group containers together or place against south-facing walls for thermal mass protection. In extremely cold regions, wrap containers with insulating material or move to unheated garages during severe cold snaps.
Resume regular watering when shoots emerge in spring, as container soil dries faster than garden soil. Check soil moisture daily during active growth periods and water when the top inch feels dry. Apply 1-2 inches of organic mulch to conserve moisture and moderate soil temperature.
Raised Bed Optimization

How to grow garlic in raised beds provides superior drainage control and soil management capabilities, making it easier to create ideal growing conditions regardless of native soil quality. The elevated growing environment also offers better accessibility for maintenance and harvest operations.
Raised Bed Construction and Soil Preparation
Construct raised beds 8-12 inches high for adequate soil depth and drainage improvement. Fill beds with a mixture of quality topsoil, aged compost, and coarse organic matter to create well-draining yet moisture-retentive growing medium. Avoid using native soil if it has drainage issues or pH problems.
Prepare raised bed soil by loosening to full depth and incorporating generous amounts of organic matter. The confined space allows for precise soil amendments and easier pH adjustment compared to in-ground gardens. Test and adjust pH to 6.0-6.5 before planting.
Planting Layout and Management
Plant garlic cloves 4 inches apart in all directions within raised beds to maximize space utilization while maintaining adequate growing room. Create planting grids using string lines or measured spacing to ensure uniform plant distribution. This spacing provides optimal balance between plant density and bulb size potential.
Apply 3-6 inches of organic mulch after planting to regulate soil temperature, conserve moisture, and suppress weed growth. Straw, shredded leaves, or grass clippings work excellently as mulch materials. The defined edges of raised beds make mulch application and maintenance more efficient.
Water and Nutrient Management
Raised beds typically drain faster than ground-level plantings, requiring more frequent irrigation during dry periods. Install drip irrigation or soaker hoses for consistent, efficient water delivery. Monitor soil moisture regularly, especially during bulb formation in late spring when water stress can significantly impact final bulb size.
The improved drainage in raised beds may require additional fertilization compared to ground-level plantings. Side-dress with compost or balanced fertilizer when shoots emerge in spring, and provide supplemental feeding during rapid growth periods.
Hydroponic and Water Growing
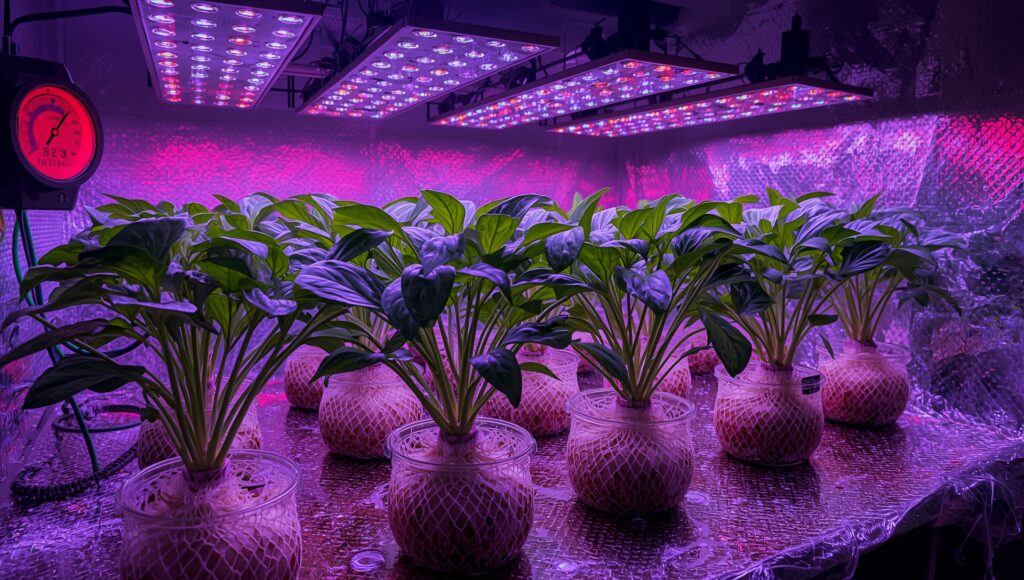
How to grow garlic in water offers a soil-free growing method that provides precise control over nutrients and growing conditions, though it requires specific equipment and techniques for optimal results. Water-based cultivation works particularly well for continuous production of garlic greens and can produce smaller bulbs with proper setup.
Simple Water Growing Methods
For basic garlic green production, start with fresh cloves showing signs of sprouting. Place cloves in shallow containers with the root end submerged and pointed tip above water level. Change water every 2-3 days to prevent bacterial growth and maintain oxygen levels.
Position containers in bright, indirect sunlight or under grow lights for 6-8 hours daily. Within 7-10 days, roots develop and green shoots emerge. Harvest outer leaves continuously while allowing center growth to continue. This method provides fresh garlic greens for 4-6 weeks.
Deep Water Culture Systems
For serious hydroponic garlic production, implement deep water culture (DWC) systems with suspended plants in net pots and roots extending into oxygenated nutrient solution. Install air pumps and airstones to maintain dissolved oxygen levels essential for healthy root development.
Maintain water temperature between 65-75°F (18-24°C) for optimal root health and nutrient uptake. Monitor and adjust pH to 6.0-6.5 weekly, as nutrient uptake affects solution pH over time. Use electrical conductivity (EC) meters to ensure proper nutrient concentration throughout the growing cycle.
Nutrient Management and Environmental Control
Hydroponic garlic requires specialized nutrient solutions formulated for soilless growing. Standard garden fertilizers lack the complete nutrient profile needed for hydroponic success. Use commercial hydroponic nutrients designed for leafy greens or herbs, following manufacturer recommendations for dilution and application frequency.
Provide 10-12 hours of LED grow lighting daily for bulb development, maintaining 12-18 inches between lights and plant canopy. Ensure gentle air circulation to prevent stagnant conditions that encourage disease development. Maintain moderate humidity (50-60%) to prevent fungal issues while supporting healthy growth.
Clove-Based Propagation
How to grow garlic from cloves represents the standard and most reliable propagation method, as each clove develops into a complete bulb containing multiple new cloves. This clonal propagation ensures new plants maintain exact characteristics of the parent bulb.
Clove Selection and Quality Assessment
Select only the largest, healthiest cloves from your seed bulbs, as clove size directly determines mature bulb potential. Examine cloves for signs of damage, soft spots, disease symptoms, or pest damage. Reserve smaller or damaged cloves for culinary use while using only premium cloves for planting.
Source seed garlic from reputable suppliers who conduct virus testing and maintain disease-free stock. Avoid grocery store garlic, which may be treated with sprouting inhibitors or carry undetected diseases. Local farmers’ markets often provide access to regionally adapted varieties with proven performance records.
Pre-Sprouting and Viability Testing
Pre-sprouting techniques can improve establishment rates and confirm clove viability before planting. Place cloves in shallow containers with minimal water touching the root end, or between damp paper towels. Maintain 65-75°F (18-24°C) temperatures in bright, indirect light for 7-10 days.
Healthy cloves develop white roots and green shoot tips within this timeframe. Discard cloves that fail to sprout or show signs of rot. Handle pre-sprouted cloves carefully during planting to avoid damaging emerging roots and shoots.
Planting Techniques and Best Practices
Plant cloves with pointed ends up and flat basal plates down at 2-3 inch depth. Proper orientation ensures straight emergence and prevents curved or malformed bulb development. Space cloves 4-6 inches apart in all directions, providing adequate room for bulb expansion without root competition.
Create planting holes using dibbles or hand tools to ensure consistent depth and avoid air pockets around cloves. Firm soil gently around each clove without compacting, and water thoroughly after planting to promote root development. Apply 3-4 inches of organic mulch to regulate soil temperature and moisture.
Spring Planting Strategies
How to grow garlic in spring presents unique challenges but remains possible with proper timing, variety selection, and management techniques. Spring planting requires understanding of vernalization requirements and acceptance of potentially reduced bulb sizes compared to fall-planted crops.
Timing and Temperature Considerations
Plant spring garlic as early as soil can be worked, typically 4-6 weeks before the last expected frost. Soil should remain cool (40-50°F or 4-10°C) to provide necessary chilling hours for bulb development. This narrow window makes precise timing critical for success.
Monitor long-range weather forecasts to ensure several weeks of cool weather after planting. Warm weather immediately following planting can prevent proper vernalization and result in single, undivided bulbs rather than multi-clove formation.
Variety Selection and Pre-Chilling
Choose softneck varieties for spring planting, as they have lower vernalization requirements and better heat tolerance. Some suppliers offer pre-chilled bulbs that have received artificial cold treatment, improving spring planting success rates. Purchase these specialty bulbs from reliable sources with proper storage handling.
Pre-chill regular seed garlic in refrigerators for 4-6 weeks before spring planting. Store bulbs in ventilated containers at 35-40°F (2-4°C) to simulate winter conditions. Keep bulbs slightly moist but not wet during chilling to prevent rot development.
Management and Expectations
Maintain consistent soil moisture throughout the growing season, as spring plantings have shorter establishment periods and higher water stress sensitivity. Apply balanced fertilizer every 3-4 weeks during active growth to compensate for shortened nutrient uptake periods.
Accept that spring-planted garlic typically produces smaller bulbs than fall-planted crops. The shortened growing season and suboptimal vernalization limit full development potential. However, these bulbs remain valuable for culinary use and can serve as seed stock for future plantings.
Home Growing Fundamentals
How to grow garlic at home successfully combines proper planning, consistent care, and patience to produce superior garlic compared to commercial alternatives. Home cultivation provides access to diverse varieties, guarantees freshness, and creates sustainable sources of planting material.
Space Planning and Layout Design
Garlic adapts to various home growing situations, from traditional garden beds to containers and raised beds. Each clove requires only 4-6 inches of growing space, making efficient use of garden real estate. Plan garden layouts to accommodate the 8-9 month growing cycle and access needs for maintenance and harvest.
Consider companion planting opportunities to maximize garden productivity. Garlic’s pest-repelling properties benefit nearby crops like tomatoes, peppers, and brassicas. Interplant garlic between slower-developing crops to utilize space efficiently.
Seasonal Care Calendar
Develop systematic care schedules based on seasonal requirements and local growing conditions. Fall tasks include site preparation, planting, mulching, and winter protection setup. Winter maintenance involves monitoring mulch depth and adjusting protection as needed.
Spring activities include mulch management, fertilizer application, and irrigation system setup. Summer care focuses on scape removal, disease monitoring, and harvest preparation. Create detailed calendars with specific dates for your location to ensure timely care.
Variety Selection and Seed Stock Management
Choose varieties suited to your climate zone and storage preferences. Order seed garlic in spring for fall planting to ensure availability of desired varieties. Store seed garlic properly in cool, dry conditions until planting time.
Save the best bulbs from each harvest for future seed stock to maintain variety purity and adapt plants to your specific growing conditions. Maintain detailed records of variety performance, maturity dates, and storage characteristics to improve future selections.
Nutritional Management and Fertilization
Understanding Garlic’s Nutrient Demands
Garlic ranks as a heavy-feeding crop requiring substantial nutrient inputs throughout its extended growing season. The crop demands balanced nutrition with particular emphasis on nitrogen for foliage development, phosphorus for root and bulb formation, and potassium for overall plant health and disease resistance.
Commercial production data indicates garlic requires 60-300 kg of nitrogen, 50-200 kg of phosphorus, and 80-300 kg of potassium per hectare, depending on soil conditions and yield goals. For home gardeners, this translates to consistent feeding throughout the growing season with attention to timing and nutrient ratios.
Soil Testing and Amendment Strategies
Conduct comprehensive soil testing before planting to establish baseline nutrient levels and pH status. Test results guide fertilization programs and identify specific nutrient deficiencies that require correction. Retest soil every 2-3 years to monitor nutrient trends and adjust management practices.
Incorporate organic matter in the form of aged compost, well-rotted manure, or other organic amendments to improve soil structure and provide slow-release nutrients. Organic matter improves nutrient retention, reduces leaching, and supports beneficial soil microorganisms that aid nutrient cycling.
Fertilization Timing and Application Methods
Apply phosphorus and potassium fertilizers before planting, as these nutrients move slowly through soil and need time to reach root zones. Incorporate these nutrients into the top 6-8 inches of soil during bed preparation.
Split nitrogen applications into 2-4 separate applications throughout the growing season. Apply the first nitrogen application when shoots emerge in spring (typically 15-25 cm or 6-10 inches tall), then continue with additional applications every 2-3 weeks until bulbing begins. Avoid high nitrogen applications late in the season, as this can delay maturity and reduce storage quality.
Organic vs. Synthetic Fertilizer Approaches
Organic fertilizers provide slow-release nutrition while improving soil health and supporting beneficial microorganisms. Composted materials, aged manures, kelp meal, and alfalfa meal offer balanced nutrition with natural growth stimulants. These materials release nutrients gradually, reducing the risk of burn and providing sustained nutrition.
Synthetic fertilizers offer precise nutrient ratios and immediate availability but require careful timing and application to avoid over-fertilization. Balanced fertilizers like 10-10-10 or specialized formulations provide quick nutrition response but don’t improve long-term soil health. Consider combining both approaches for optimal results.
Pest and Disease Management
Common Garlic Diseases and Prevention
White rot (Sclerotium cepivorum) represents the most serious fungal disease affecting garlic, causing yellowing and wilting of leaves, white fluffy growth at plant bases, and formation of black sclerotia on bulbs and roots. This disease persists in soil for many years, making prevention through crop rotation essential.
Implement 4-year crop rotation cycles, avoiding planting alliums in the same location to break disease cycles. Enhance soil health through organic matter additions and beneficial microorganism support to suppress pathogenic fungi. Soil solarization using clear plastic covering can help reduce fungal spore populations in heavily infected areas.
Downy mildew (Peronospora destructor) appears as pale yellow patches on leaves that eventually turn brown and die. Gray mold may develop on leaf undersides during humid conditions. Prevent downy mildew through proper plant spacing for air circulation, morning watering to allow foliage drying, and selection of resistant varieties when available.
Fusarium basal rot affects garlic bulbs and roots, causing rot that can persist in storage. Prevent fusarium through well-draining soil, proper curing techniques, and avoiding mechanical damage to bulbs during harvest and handling.
Integrated Pest Management Strategies
Implement comprehensive IPM programs combining cultural practices, biological controls, and targeted interventions. Cultural practices include crop rotation, sanitation, soil health improvement, and resistant variety selection.
Physical controls such as floating row covers protect young plants from flying pests, while sticky traps monitor and reduce insect populations. Hand-picking removes larger pests like caterpillars and beetles when populations are manageable.
Encourage beneficial insects through diverse plantings and habitat provision. Predatory insects, spiders, and parasitic wasps help control pest populations naturally when provided with suitable environments.
Organic Pest Control Methods
Garlic’s natural pest-repelling properties make it an excellent companion plant, but garlic itself can be affected by specific pests. Onion thrips cause silver streaking on leaves and can reduce bulb size. Control thrips through blue sticky traps, beneficial insect encouragement, and removal of plant debris that harbors overwintering adults.
Garlic bloat nematodes cause swollen, distorted bulbs and can persist in soil. Hot water treatment of seed cloves (120°F for 20 minutes) and strict crop rotation help control nematode populations. Avoid planting in areas with known nematode problems.
Create organic pest control sprays using garlic, hot peppers, and other natural ingredients. These homemade preparations can deter soft-bodied insects and provide some disease suppression. Apply during cooler parts of the day to avoid plant stress.
Companion Planting and Garden Integration
Strategic Companion Plant Selection
Companion planting with garlic provides multiple benefits including pest control, space utilization, and improved growing conditions for neighboring crops. Garlic’s strong sulfur compounds naturally repel many garden pests while its compact growing habit allows intercropping with larger plants.
Tomatoes and garlic form an excellent partnership, with garlic repelling red spider mites, aphids, and providing some protection against fungal diseases. Plant garlic cloves around tomato transplants in spring, spacing them 6-8 inches from plant bases. The garlic matures just as tomatoes reach peak production, providing efficient space utilization.
Brassica family crops including cabbage, broccoli, cauliflower, and kale benefit significantly from garlic’s pest-deterrent properties. Garlic helps repel cabbage loopers, diamondback moths, and aphids that commonly attack brassicas. Interplant garlic between brassica plants or create border plantings around brassica beds.
Carrots and garlic complement each other well, with garlic deterring carrot root flies while carrots help improve soil structure around garlic bulbs. The different root depths and growing seasons allow efficient space sharing.
Garden Design and Layout Strategies
Design garden layouts that maximize garlic’s companion planting benefits while ensuring adequate growing space for all crops. Create permanent garlic growing areas that rotate through different sections of the garden on 3-4 year cycles.
Establish garlic borders around susceptible crops to create protective barriers against pest invasions. These living fences provide ongoing protection throughout the growing season while producing valuable garlic harvests.
Consider timing relationships when planning companion plantings. Garlic planted in fall emerges in spring alongside many annual vegetables, providing pest protection during critical early growth periods. Harvest timing allows garden bed succession planning with summer crops following garlic harvest.
Crop Rotation Integration
Integrate garlic into comprehensive crop rotation systems that prevent soil-borne disease buildup and maintain soil fertility. Follow garlic crops with heavy feeders like tomatoes or peppers that benefit from residual soil fertility.
Avoid planting garlic or other alliums in the same location more than once every 4 years. This extended rotation breaks pest and disease cycles while allowing soil nutrients to replenish. Use the intervening years for crops from different plant families.
Plan rotation sequences that build soil health through nitrogen-fixing legumes and organic matter additions. Include cover crops in rotation cycles to further improve soil structure and prevent erosion during fallow periods.
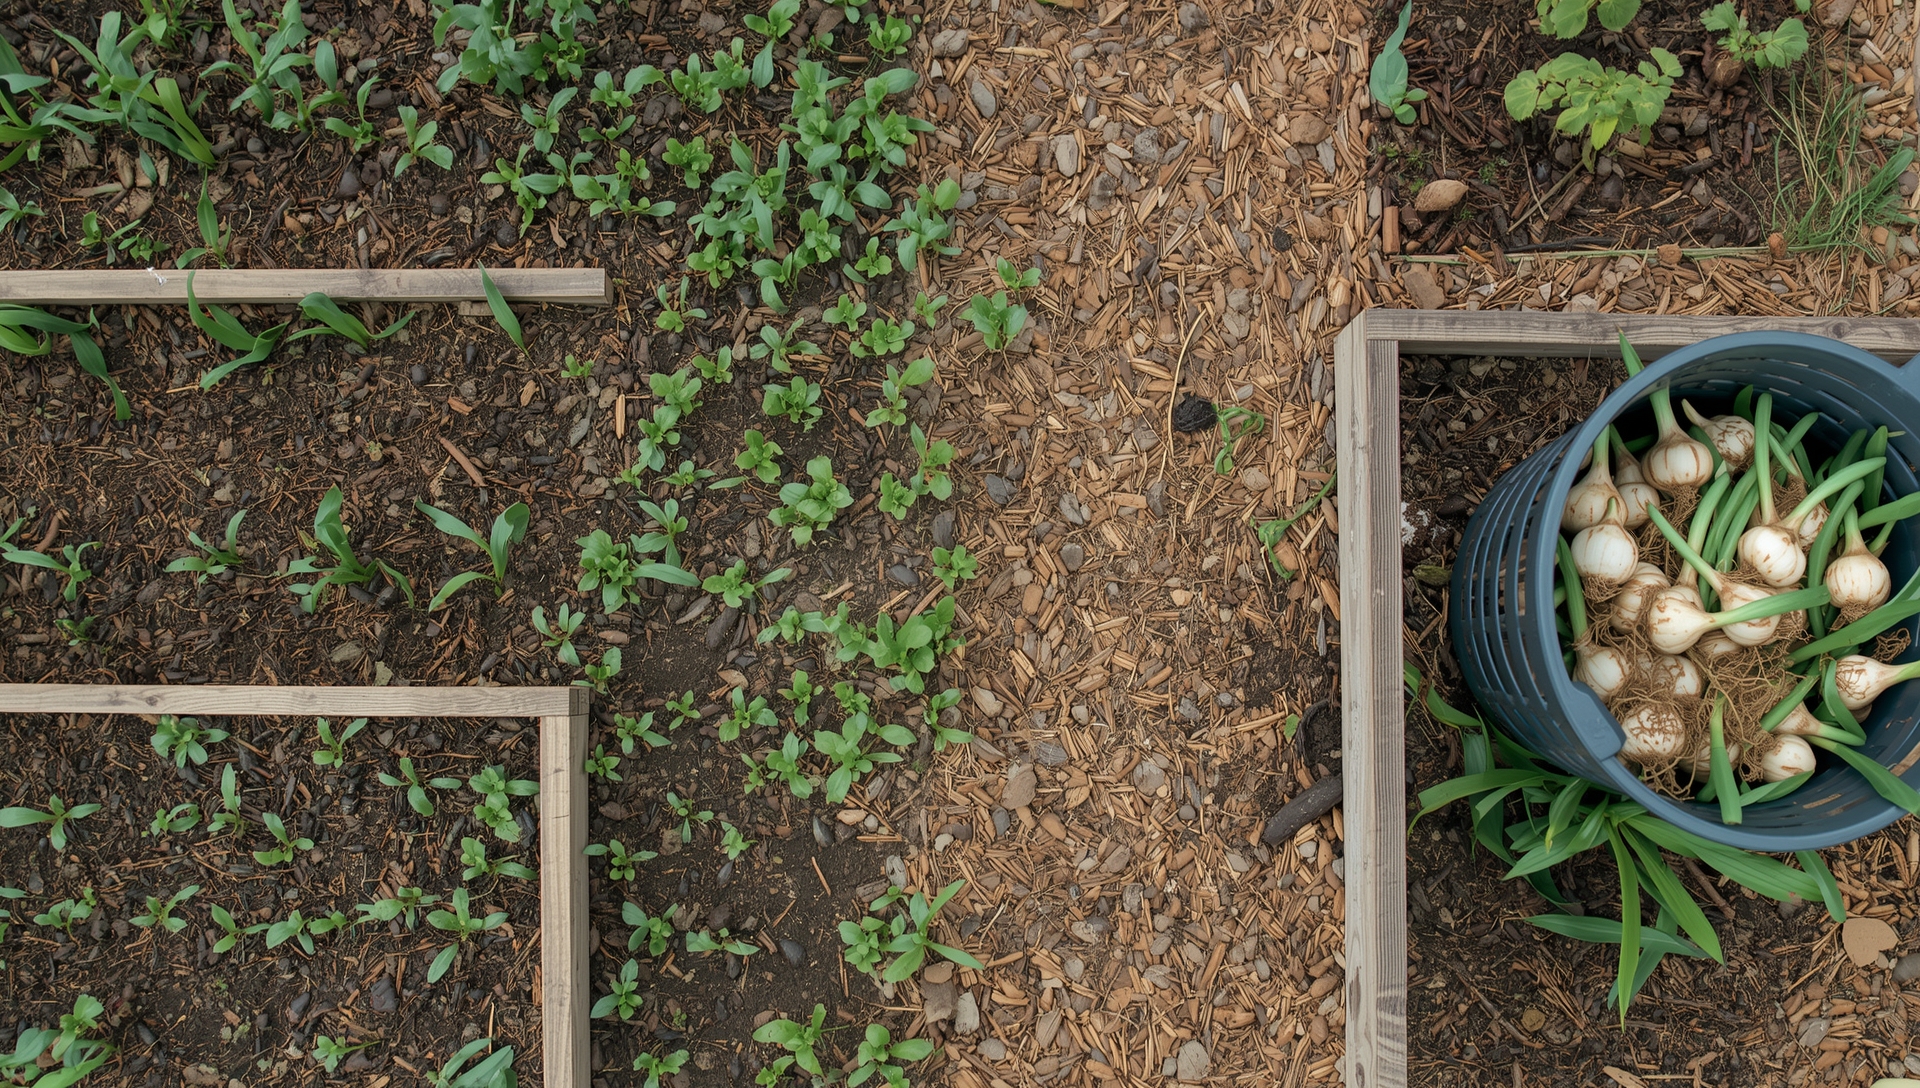
Harvesting and Post-Harvest Handling
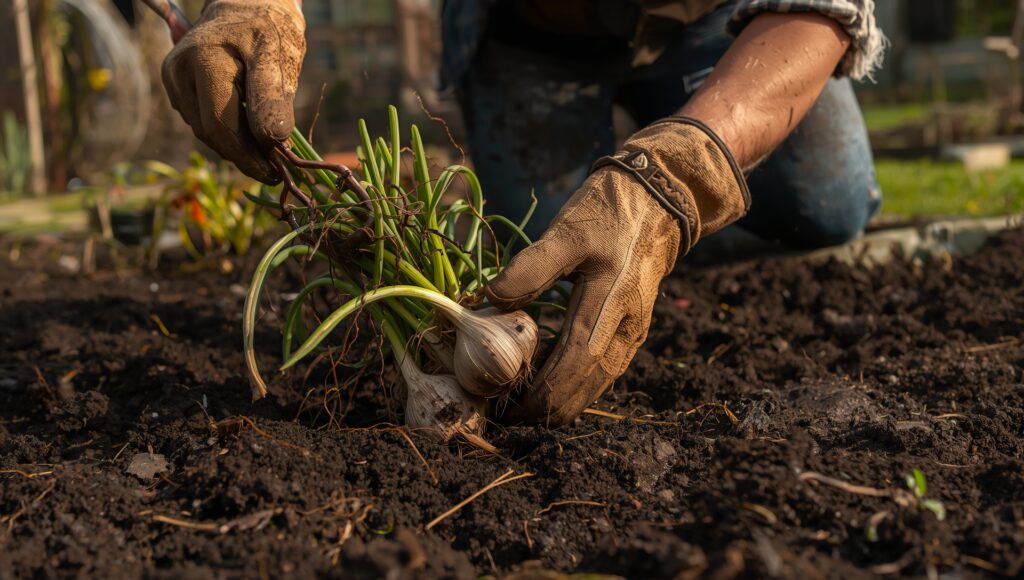
Recognizing Harvest Maturity
Proper harvest timing is crucial for achieving optimal flavor, storage life, and bulb quality. Garlic typically matures 240 days after planting, though this varies by variety and growing conditions. The key is monitoring multiple maturity indicators rather than relying on calendar dates alone.
The most reliable harvest indicator is leaf color progression. Wait for at least 2-3 bottom leaves to turn brown while several green leaves remain. Each leaf above ground corresponds to one wrapper layer around the bulb, so premature harvest results in inadequate protection for storage.
For hardneck varieties, scape straightening provides an additional maturity signal. As bulbs near maturity, previously curled scapes straighten to upright positions. However, if scapes were removed earlier for culinary use, rely on leaf browning for timing decisions.
Harvest Techniques and Timing
Test harvest readiness by carefully digging sample plants and examining bulb development. Mature bulbs should be well-formed, plump, and firm with tight-fitting wrapper leaves. Cloves should completely fill their individual wrappers without loose space.
Harvest during dry weather conditions when possible to reduce disease risks and speed curing processes. Avoid harvesting when soil is waterlogged, as wet conditions increase bulb damage and rot potential. Choose morning harvest times when plants are fully hydrated but surface moisture has evaporated.
Use appropriate tools for harvest to minimize bulb damage. Spading forks or broad digging forks work better than spades for loosening soil around bulbs. Lift plants carefully, brushing away excess soil without removing protective outer wrappers.
Curing and Initial Processing
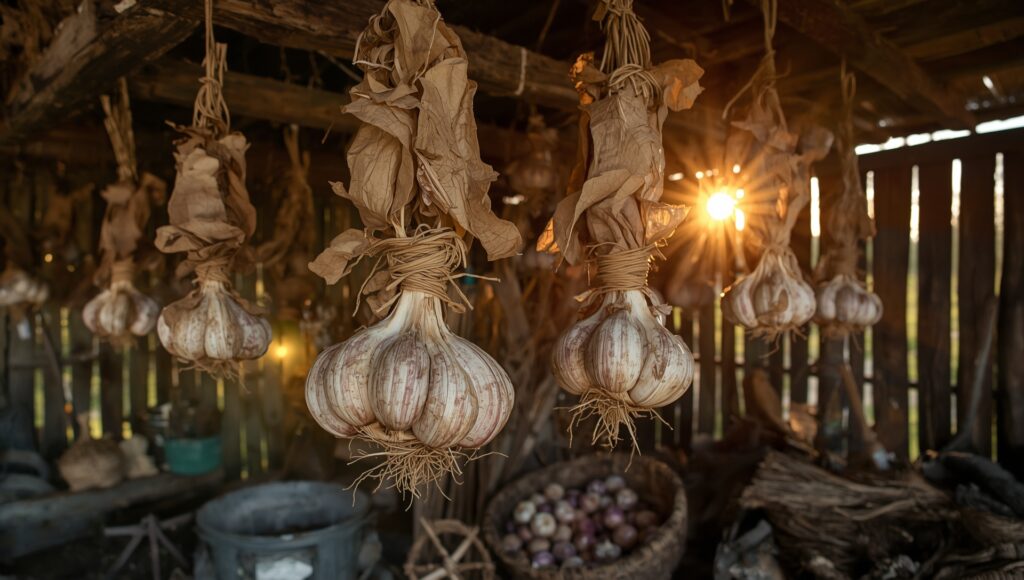
Begin curing process immediately after harvest to ensure maximum storage life. Proper curing removes excess moisture from outer wrappers while preserving bulb quality. This process typically requires 2-4 weeks depending on environmental conditions.
Cure garlic in warm (80-85°F or 27-29°C), dry, well-ventilated areas with good air circulation. Avoid direct sunlight during curing, which can cause bulb deterioration. Ideal curing locations include well-ventilated garages, covered porches, or dedicated curing structures.
Bundle 4-6 plants together by their tops and hang from rafters or drying racks. Alternatively, spread individual bulbs on screened racks with adequate spacing for air circulation. Turn bulbs occasionally during curing to ensure even drying.
Storage and Preservation Methods
Long-Term Storage Techniques
Properly cured garlic stores 6-10 months depending on variety, with softneck types generally outlasting hardneck varieties. Create optimal storage conditions in cool (32-38°F or 0-3°C), dry (65-70% humidity), dark locations with good air circulation.
Avoid refrigerator storage for whole bulbs, as cold, humid conditions promote sprouting and deterioration. Similarly, avoid sealed containers or plastic bags that trap moisture and encourage mold development. Mesh bags, slatted crates, or braided bundles provide ideal storage formats.
Monitor stored garlic regularly for signs of sprouting, softening, or mold development. Remove affected bulbs promptly to prevent spread to healthy stock. Use sprouting or soft bulbs first, as they won’t store much longer.
Value-Added Preservation Methods
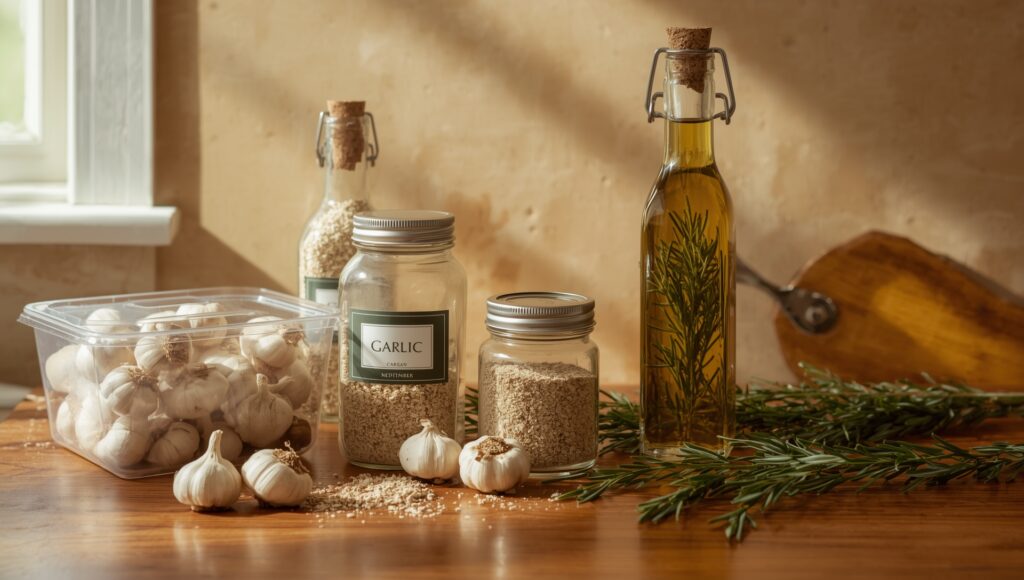
Process excess garlic into various preserved forms to extend usability beyond fresh storage limits. Freezing offers the simplest preservation method—whole cloves freeze well in sealed containers for up to 12 months. Chopped or pureed garlic mixed with oil freezes into convenient portions for cooking use.
Dehydrate garlic cloves into flakes or powder for long-term storage. Slice cloves thinly and dry at 140°F (60°C) until crisp, then grind into desired consistency. Store dried garlic in airtight containers in cool, dark locations.
Create garlic-infused oils or vinegars for culinary use, following safe preparation methods to prevent botulism risks. Acidify fresh garlic with citric acid before oil immersion, or store garlic-oil combinations in refrigerators for short-term use. Wine or vinegar preservation creates safe, long-term storage options.
The journey from single clove to mature bulb represents one of gardening’s most rewarding experiences, combining patience, skill, and understanding of plant biology. Success with garlic cultivation opens doors to diverse varieties, exceptional flavors, and the satisfaction of producing an essential culinary ingredient from your own garden. Whether grown in traditional beds, raised containers, or hydroponic systems, garlic rewards careful attention with abundant harvests that can last throughout the year while providing seed stock for future plantings.
Frequently Asked Questions
Q1: When is the best time to plant garlic?
A1: The optimal time to plant garlic is in mid to late fall, about 4–6 weeks before the ground freezes, when soil temperatures are around 50°F (10°C). This timing allows cloves to establish strong roots before winter dormancy and ensures proper vernalization for bulb formation.
Q2: How deep and how far apart should garlic cloves be planted?
A2: Plant cloves 2–3 inches deep with the pointed end up, spacing them 4–6 inches apart in all directions. Rows should be spaced 12–18 inches apart to allow easy access for weeding, fertilizing, and harvesting.
Q3: How often should I water and fertilize garlic?
A3: Garlic requires about 1 inch of water per week, applied deeply but infrequently to encourage strong root development. Stop watering 2–3 weeks before harvest to allow bulbs to cure. Apply a balanced fertilizer at green-up in spring and again mid-season (6–8 weeks later), avoiding high nitrogen late in the season.
Q4: How do I protect garlic during winter and extreme cold?
A4: In cold climates or for container-grown garlic, apply 3–6 inches of organic mulch (straw, leaves) after planting to insulate soil. In zones 6 and colder, consider additional protection like wrapping containers in burlap or using row covers over beds during severe cold snaps.
Q5: When and how do I harvest and store garlic for long-term use?
A5: Harvest garlic when the bottom 4–6 leaves have turned brown but several green leaves remain. Cure bulbs in a warm, dry, well-ventilated space for 2–4 weeks. Store cured garlic at 32–38°F (0–3°C) with 65–70% humidity in mesh bags, baskets, or braided bundles. Properly stored garlic can last 6–10 months.